U-Handbag writes a very good post about putting a price on your work:

Pricing Your Bags or other Crafts to Sell

This has always been a big topic in my jewelry studio.  My teacher says to triple the price of materials and that’s your wholesale price.  In the past I have doubled the price of materials, added an hourly wage for myself, and added a fixed amount to cover packaging and other expenses.  Sometimes I only add up the price of materials and add an hourly wage for my wholesale price, then I double it for my retail price.  And sometimes, I admit, I’ll just wave the magic wand in my head and come up with a price that really has nothing to do with anything, except maybe emotions.  I guess the question then becomes “How much does someone have to pay to get me to part with this precious baby?”

Yes, it’s all very scientific, this thing called pricing.

raw_diamonds 
Earrings:  champagne diamond briolettes, wire-wrapped in 14k yellow gold.

Even the women in my jewelry studio who do much more selling than I do seem to be stumped when it comes to pricing.  For example, I recently asked one of them how much she was charging for a particular piece (it was a custom order for an acquaintance) and she quoted one price.  When I said I might be interested in having her make one for me, she said she’d charge me a different (lower) amount.  So in this scenario, we have wholesale pricing, retail pricing, acquaintance pricing, and friend pricing.

I suppose with all of this housecleaning I’ve been doing, I’m going to have to figure out a pricing system and stick to it, because frankly, that little magic wand in my head is getting a bit worse for wear.

raw_diamonds_bracelet

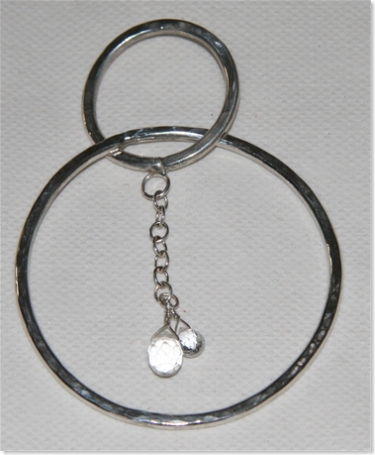
Bracelet:  raw diamond beads wire-wrapped in 14k yellow gold.

About once a year, I find the need to “re-vamp” my jewelry business in one way or another.  Sometimes it’s a complete overhaul, other times it’s just a change in my line(s).  This time it’s not only an overhaul, it’s a complete tear-down and re-build!

I began by starting a business plan.  If you’ve ever written one before, you know it’s beyond tedious.  I think I spent about fifteen minutes on it before I decided maybe I should just write up a list of business priorities.  Much simpler.  Number one on my list?  Organize my finances!

When I started looking through all my receipts and paperwork, I was surprised to see that I haven’t prepared my California sales taxes for over two years.  I knew I was behind, but not that bad.  So I painfully went through each receipt, calculated my sales, and figured out what I owe for 2005.  Today I plow through 2006.

As it turned out, going through my receipts from 2005 was actually kind of a walk through memory lane.  Take these bangles, for example:

2005_bangles 
I sold these bracelets on eBay, and the woman who bought them ended up being a repeat customer.  In fact, we collaborated on a pair of custom earrings.

The earrings below are still in my own collection.  I include them here because they were made during the same time period and they are kind of different from my current style:

2005_multistone 
The necklace below is one of my all time favorites.  It is a hand-fabricated sterling pendant on sterling silver chain.  I don’t remember who bought it, but I hope they are still enjoying it.

2005_circle_blue_topaz 
One thing that struck me while I was “cleaning house” is how many sales I had in 2005.  Far more than I had in 2006 and 2007.  That’s my own fault, of course.  I’d like to get my business re-vamped in time for Christmas sales, and I have a time-line for that to happen, but I’m easily distracted.  I suppose I should just get these taxes finished and go from there!

I have never done this before so forgive me if I do it wrong.

4. Love it! This is my thing:
Jewelry making/goldsmithing, knitting, painting pictures of dogs, genealogy

3. I do or have dabbled in it:
Sewing, cooking, interior decoration, entertaining, gardening, singing, song writing, poetry, graphic design, web design, writing, wine tasting, screenwriting, filmmaking, knit design/pattern making, guitar playing, beading

2. Would love to try it; it’s on my list:
Dyeing fibers, spinning, furniture making, clothing design, tiling, mosaics, doll house making, glass blowing, pottery, quilting, acting, drawing, watercolors, doll making, wine making, piano playing, enameling, silk screening

1. I’ve got absolutely no interest:
Basket weaving, candle making, card making, soap making, flower arranging, balloon animal making, etching, glass bead making, lace making (needle lace, cutwork), lucet, paper-mâché, rug hooking, scrapbooking, stamping, tatting, wood carving, calligraphy, paper making, cross stitch, embroidery

This is very similar to my “things I want to learn” post, I know.  But I can never resist being part of the crowd.

Earlier in the week I mentioned a Swap-Bot project I was working on which featured a knitted serpent.  What could it possibly be, you might ask?  Well, it’s finished and ready for it’s unveiling:

voodoo_man
Perhaps I should’ve warned you.  The purpose of this swap was to make a voodoo doll, which explains the curious, somewhat creepy, picture above.

I love voodoo dolls, so when I read this swap I knew I had to sign up.  But what kind of doll to make?  I wanted to be creative.

I really don’t consider myself a feminist, but I’ve always kind of bristled at the Christian concept of sin and how Woman brought it to Man and as a result she is Cursed.  I don’t know, it just seems a little outrageous to me.  I think Eve has gotten a pretty bad rap, and I’m sure she thinks so as well.  I figured she wouldn’t mind having a voodoo doll to incur a little of the wrath of God(dess) on her partner.

Thus, this Voodoo Man was born.

voodoo_man_closeup
He comes complete with a serpent, apple, fig leaf and pin.  The always mischievous Eve can inflict him with the pain of childbirth, leg waxing, and cramps, or, if she so desires, the discomfort of thong panties:
voodoo_man_back
I absolutely love the concept of this doll, if not the execution.  I made a few mistakes along the way, but this is a great prototype.  I want to make more of these in the future, but will have to experiment with materials, faces, etc.

Swap-Bot is fun!

Thanks again to Rachel at Knitting Pattern Central for linking to my serpent pattern.  She is one of the most responsive webmistresses I know, certainly far more responsive than I am.

It’s really nice to get a link like this because it gives a big boost to my page views, even if it’s only temporary.

In other knitting news, I "applied" to be a Knitster on Knitty Gritty this week.  I don’t even know if they’re casting right now, but why not give it a try?  I also submitted my blog to be a featured site on TypePad today.  I need all the PR I can get!

I am surprised by the amount of compliments I’ve gotten on my lotus necklace.  In fact, someone wanted to buy!  Thanks, Antoinette!

Since I sold the first one I made, I went to jewelry class today with the intention of making a second one to keep for myself.  Somewhere along the way I decided to make one without the gold accent.  Voila:

lotus_silver 
I also made a pair of earrings in this design, which I will blog about tomorrow.

The hand-fabricated lotus petal is made with 20g (.7mm) sterling silver plate.  I drew the design with a sharpie directly onto the metal, then cut it out with a jeweler’s saw.

Next, I filed the edges smooth and rubbed out any scratches with emery paper.  I then stamped the back with my initials and domed the piece so it is concave.

The hardest part of this whole project (and really, most of the projects I do) was soldering the jump ring onto the lotus petal.  It doesn’t seem to matter how much experience I have in making jewelry–soldering jump rings to something else is always a challenge.

lotus_silver_2 
I finished the pendant by burnishing the inside of the lotus petal with my flex shaft using a wire brush attachment.  I added a 16″ chain and a hand-fabricated clasp, and I’m very pleased with the result.

As part of a project I’m working on for a SwapBot swap, I designed a knitted serpent:

serpent

For my purpose, I needed a very small serpent, so I used a fingering weight yarn and size 0 needles.

Knit this serpent with fine gauge yarn and use it for a bookmark or an embellishment for a hat or a sweater.  A bulky weight yarn and larger needles would make it thick enough for a skinny scarf.  Use your imagination and modify the pattern to meet your needs.

Skill Level
Beginner

Materials
One skein yarn of your choice (you will use much less)
2 Double pointed needles in the smallest size recommended for your yarn
1 Tapestry needle
1 Embroidery needle
Embroidery thread in colors of your choice (I used red and black)
Crochet hook in size appropriate to yarn

Stitch Patterns
Stockinette stitch:
Knit one row, turn work, purl one row
K: Knit
M1L (Make 1 Left):  From the front, lift yarn between stitches onto left needle.  Knit into the back of the resulting loop.  Results in a right slanting increase.
M1R (Make 1 Right):  From the back, lift yarn between stitches onto left needle.  Knit into the front of the resulting loop.  Results in a left slanting increase.
I-cord: Using double pointed needles, knit one row.  Without turning your work, slide loops to the front of the needle.  Knit another row.  Continue in this pattern until your cord is of the desired length.
SSK:  Slip one stitch knitwise.  Slip the next stitch knitwise.  Insert your left needle into the front of the slipped loops and knit together (through the back of the loops).  Results in left slanting decrease.
K2Tog:  Knit two stitches together as if they were one stitch.  Results in right slanting decrease.

To Knit:

Head
With your double pointed needles, c/o 5 using double cast-on
Row 1 – Purl
Row 2 – k1, M1R, k3, M1L, k1 (7 stitches remain)
Row 3 – Purl
Row 4 – k1, M1R, k5, M1L, k1 (9 stitches remain)
Row 5 – Purl
Row 6 – k1, SSK, k3, k2tog, k1 (7 stitches remain)
Row 7 – Purl
Row 8 – k1, SSK, k1, k2tog, k1 (5 stitches remain)
Row 9 – Purl

Body
Switch to i-cord.  Knit to desired length

Tail
Row 1 – k1, SSK, k2tog (3 stitches remain)
Row 2 – Purl
Row 3 – Knit
Row 4 – Purl
Row 5 – k2tog, k1 (2 stitches remain)
Row 6 – Purl
Row 7 – Knit
Row 8 – b/o 2

Finishing
Weave in ends.  Block head into “diamond” shape.  Block body and tail so that the tail tapers evenly.

Eyes
– Using the satin stitch, embroider the serpent’s eyes in the color of your choice.
Tongue – Fold your embroidery thread in half.  Using your crochet hook, draw the loop of thread through the front edge of the serpent’s head.  Draw the loose ends of the thread through the loop and pull tightly to form a knot.  To fork the end of the tongue, make a second knot a bit further down and trim the ends of the thread to desired length.  Note:  Depending upon the weight of the yarn you use in this project, you might want to substitute the embroidery thread for a yarn in the appropriate thickness.